CI/CD Concepts and Your First Pipeline on AWS EC2
This is the first part
This Part 1 walks through deploying a web app (React frontend + Node.js backend) to AWS EC2 with Docker, then setting up a CI/CD pipeline on GitHub Actions to automate the whole process.
Note: to keep this guide short and focused on the CI/CD flow, the EC2 instance is launched in the Default VPC. In a real production setup, use a dedicated VPC for better security.
What is CI/CD
- CI (Continuous Integration): automating the process of merging code, building, and running tests every time new code lands on a shared branch.
- CD (Continuous Delivery): automatically taking the app to a release-ready state, but the final production deploy still requires a manual approval (a button click).
- CD (Continuous Deployment): one level further — code that passes every check is automatically deployed straight to Production with no human in the loop.
Why CI/CD
- Consistency: every deploy runs through the exact same procedure — no more "it works on my machine but not on the server."
- Audit trail: the system records who deployed which version, at what time, and which step failed — easy to investigate when something breaks.
- Fast rollback: every pipeline run is a snapshot, so reverting to a previous version is a one-click operation.
- Team scale: CI gives each branch/PR its own automated test pipeline, so multiple people can work in parallel without stepping on each other.
Standard pipeline stages
A production-grade CI/CD pipeline typically flows through these stages:
[Source] ──> [Build] ──> [Test] ──> [Quality Gate] ──> [Package] ──> [Deploy] ──> [Verify]
- Source/Checkout: pull the latest source from the repository.
- Build: compile/bundle the source code.
- Test: run automated tests (unit tests, integration tests).
- Quality Gate: the gatekeeper that evaluates quality (test coverage, security score, etc.). If thresholds are not met, the pipeline halts.
- Package: produce the release artifact (Docker image,
.jar,.zip, etc.). - Deploy: push the artifact to the target environment (Staging, Production).
- Verify: smoke-test the freshly deployed server to confirm it is actually alive.
GitHub Actions terminology
- Workflow: a complete CI/CD pipeline (one YAML file).
- Job: a group of tasks within a workflow (e.g. Build job, Deploy job).
- Step: a single action inside a Job (e.g. running a bash command).
- Action: a reusable building block published by the community (e.g. an action that copies files, or logs into Docker).
Tip: always pin actions to a specific version like
@v4or@v1.0.3rather than@mainor@master. Pinning keeps the pipeline stable and avoids breaking when the action's author ships an incompatible update. - Runner: the VM that actually executes your commands.
- Hosted runner: a fresh VM provided by GitHub (free for public repos).
- Self-hosted runner: a machine you host yourself and register with GitHub.
- Event: the trigger that kicks off a workflow (e.g.
push,pull_request). - Secret: an encrypted environment variable (passwords, API keys, SSH keys).
- Artifact: a file produced mid-run (e.g.
.zip,.jar) saved for download or for the next Job. - Environment: a virtual deployment environment (
production,staging) used to gate deploys behind approval rules. - Context expression
${{ ... }}: the syntax for reading dynamic values inside YAML — e.g.${{ secrets.EC2_HOST }}reads a Secret,${{ github.sha }}returns the current commit SHA. needs:declares ordering between Jobs. A Job withneeds: buildwaits for thebuildJob to finish successfully before it starts.if:conditional execution — e.g.if: github.ref == 'refs/heads/main'only allows a step to run when the push targetsmain.
Reference: Understanding GitHub Actions - GitHub Docs
Testing inside CI
A CI flow with no tests is just an automated way of shipping bugs to Production. Tests are the Quality Gate that keeps the main branch healthy.
- Lint / static analysis: catch syntax errors and coding-convention violations before running anything (e.g. ESLint for JS).
- Security scan: check whether dependencies have known vulnerabilities (e.g. npm audit, Trivy).
- Unit test: verify each individual function in isolation.
- Integration test: ensure modules behave correctly when wired together (or when talking to a database).
- Smoke test: after deploy, hit a live endpoint to confirm the site is up (see the Healthcheck note below).
A sample YAML that wires a test chain into the pipeline:
  test:
    name: Test & Lint
    runs-on: ubuntu-latest
    steps:
      - uses: actions/checkout@v4
      - run: npm ci
      - run: npm run lint    # Lint
      - run: npm audit       # Security scan
      - run: npm test        # Unit test
Deploy strategies
When pushing new code to Production, these are the common strategies: - Recreate: stop the whole old stack, then start the new one. Simplest of all, but comes with downtime. This is exactly the strategy used in the case study below. - Rolling Deployment: update one server at a time. No downtime. - Blue-Green Deployment: stand up a brand-new environment (Green) alongside the old one, test it, then switch traffic over. No downtime; rollback is trivial. - Canary Deployment: route 5% of users to the new build first; if healthy, gradually scale to 100%. No downtime, lowest risk.
Case study: building your first pipeline
Prepare the source code (do this on your local machine)
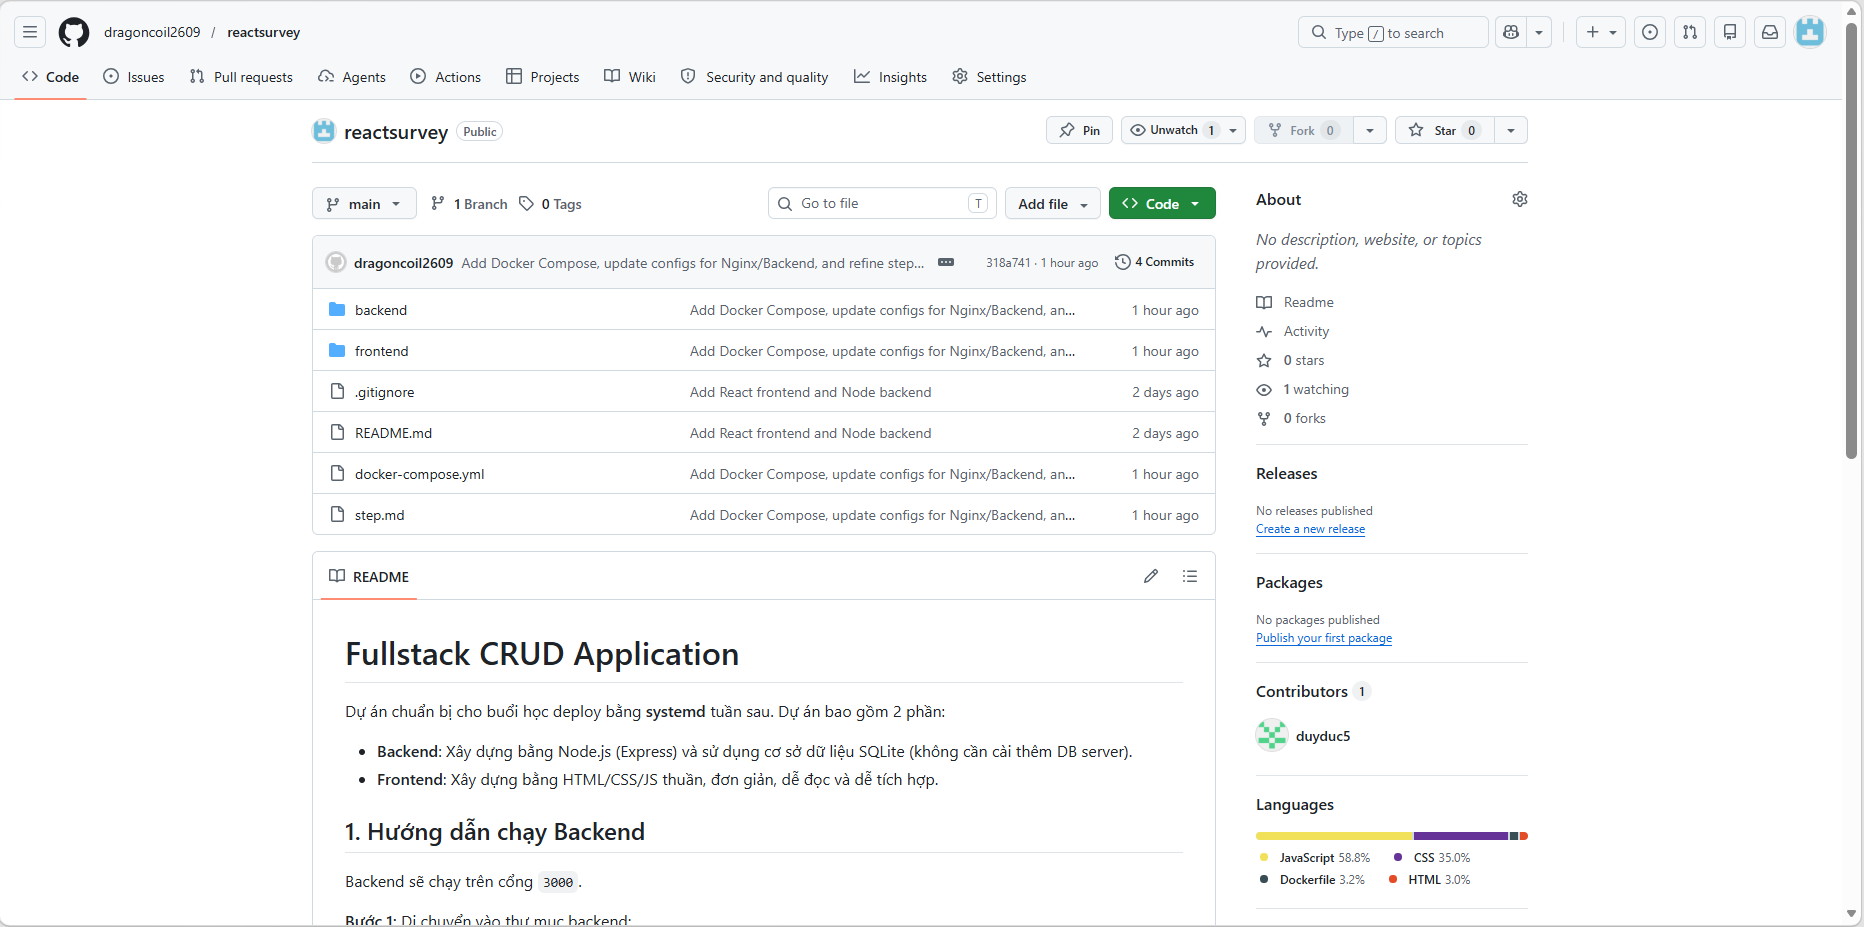
Before touching the server, the project needs to be wired up with Docker and pushed to GitHub. To save time you can clone the sample repository — it ships with docker-compose.yml, an Nginx proxy config, and DB connection via env vars already wired in.
Recommended: a .dockerignore file.
A critical step before any Docker build is creating a .dockerignore file. List directories like node_modules/ and .git/ here so Docker doesn't drag hundreds of MB of junk into the image. This makes builds dramatically faster and keeps the server's memory footprint small.
Sample source repository: https://github.com/dragoncoil2609/reactsurvey.git
Prepare the server and run it manually (on AWS EC2)
1. Launch an EC2 instance On the AWS Console:
- Sign in to the AWS Console, open the EC2 service, then click Launch Instance.
- OS: pick Ubuntu Server 22.04 LTS (or 24.04 LTS).
- Network: use the Default VPC so you get a Public IP out of the box.
- Security Group: open port
22(for SSH) and port80(for web access).Security note: never open port
22to0.0.0.0/0(the whole internet) in a real environment. Restrict it to your own IP so attackers can't brute-force SSH. - Create and download a Key Pair (e.g.
my-key.pem).
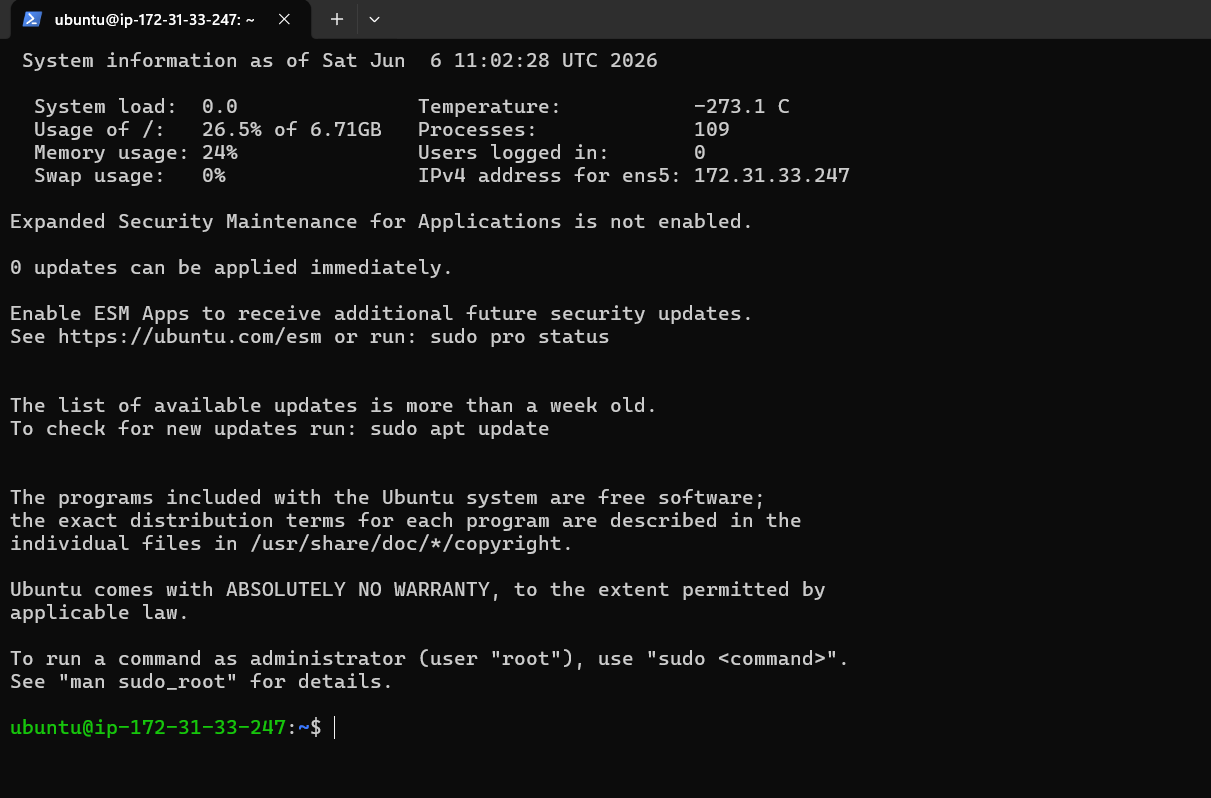
2. Install Docker via a shell script Open a terminal and SSH into the new server:
ssh -i /path/to/my-key.pem ubuntu@<EC2_PUBLIC_IP>
Use this script to install Docker and Docker Compose automatically:
Create the script file:
mkdir tools && cd tools
mkdir docker && cd docker/
nano install-docker.sh
Paste this into the file:
#!/bin/bash
sudo apt update
sudo apt install -y apt-transport-https ca-certificates curl software-properties-common
curl -fsSL https://download.docker.com/linux/ubuntu/gpg | sudo gpg --dearmor -o /usr/share/keyrings/docker-archive-keyring.gpg
echo "deb [signed-by=/usr/share/keyrings/docker-archive-keyring.gpg] https://download.docker.com/linux/ubuntu $(lsb_release -cs) stable" | sudo tee /etc/apt/sources.list.d/docker.list > /dev/null
sudo apt update
sudo apt install -y docker-ce
sudo systemctl start docker
sudo systemctl enable docker
# Pin a specific version for reproducibility
sudo curl -L "https://github.com/docker/compose/releases/download/v2.27.0/docker-compose-$(uname -s)-$(uname -m)" -o /usr/local/bin/docker-compose
sudo chmod +x /usr/local/bin/docker-compose
docker --version
docker compose version
(Press Ctrl+O, Enter to save, then Ctrl+X to exit.)
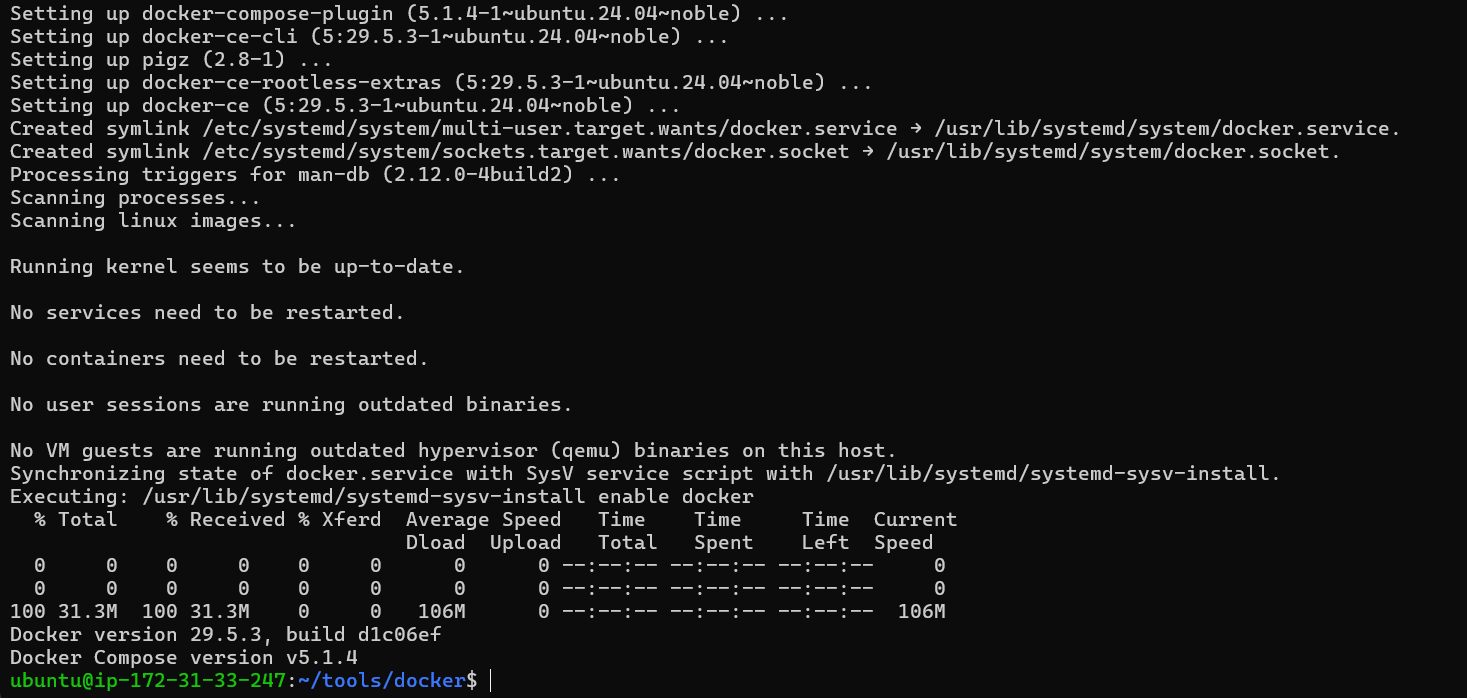
Run the install script:
chmod +x install-docker.sh
bash install-docker.sh

# Grant the ubuntu user docker access:
sudo usermod -aG docker ubuntu
(Note: type exit to leave SSH and reconnect for the new group membership to take effect.)
3. Manual deploy first DevOps rule of thumb: always confirm the app works by hand before automating it.
- Clone the repo onto the EC2 instance:
git clone https://github.com/your-username/your-repo-name.git ~/app
- Move into the folder and start the stack:
cd ~/app
docker compose up -d --build

- Open a browser and visit the EC2 instance's Public IP to check the UI.
- Once the app is confirmed working, stop everything to leave a clean environment for GitHub Actions to take over:
docker compose down
Wire up CI/CD with GitHub Actions
With source code and server ready, set up an automated 3-step pipeline: Build → Deploy → Show Log. (Note: to keep this lab entry-level the pipeline temporarily skips the Test stage and focuses on deployment. A "Show Log" step is added at the end so you can inspect status and debug after the app boots.)
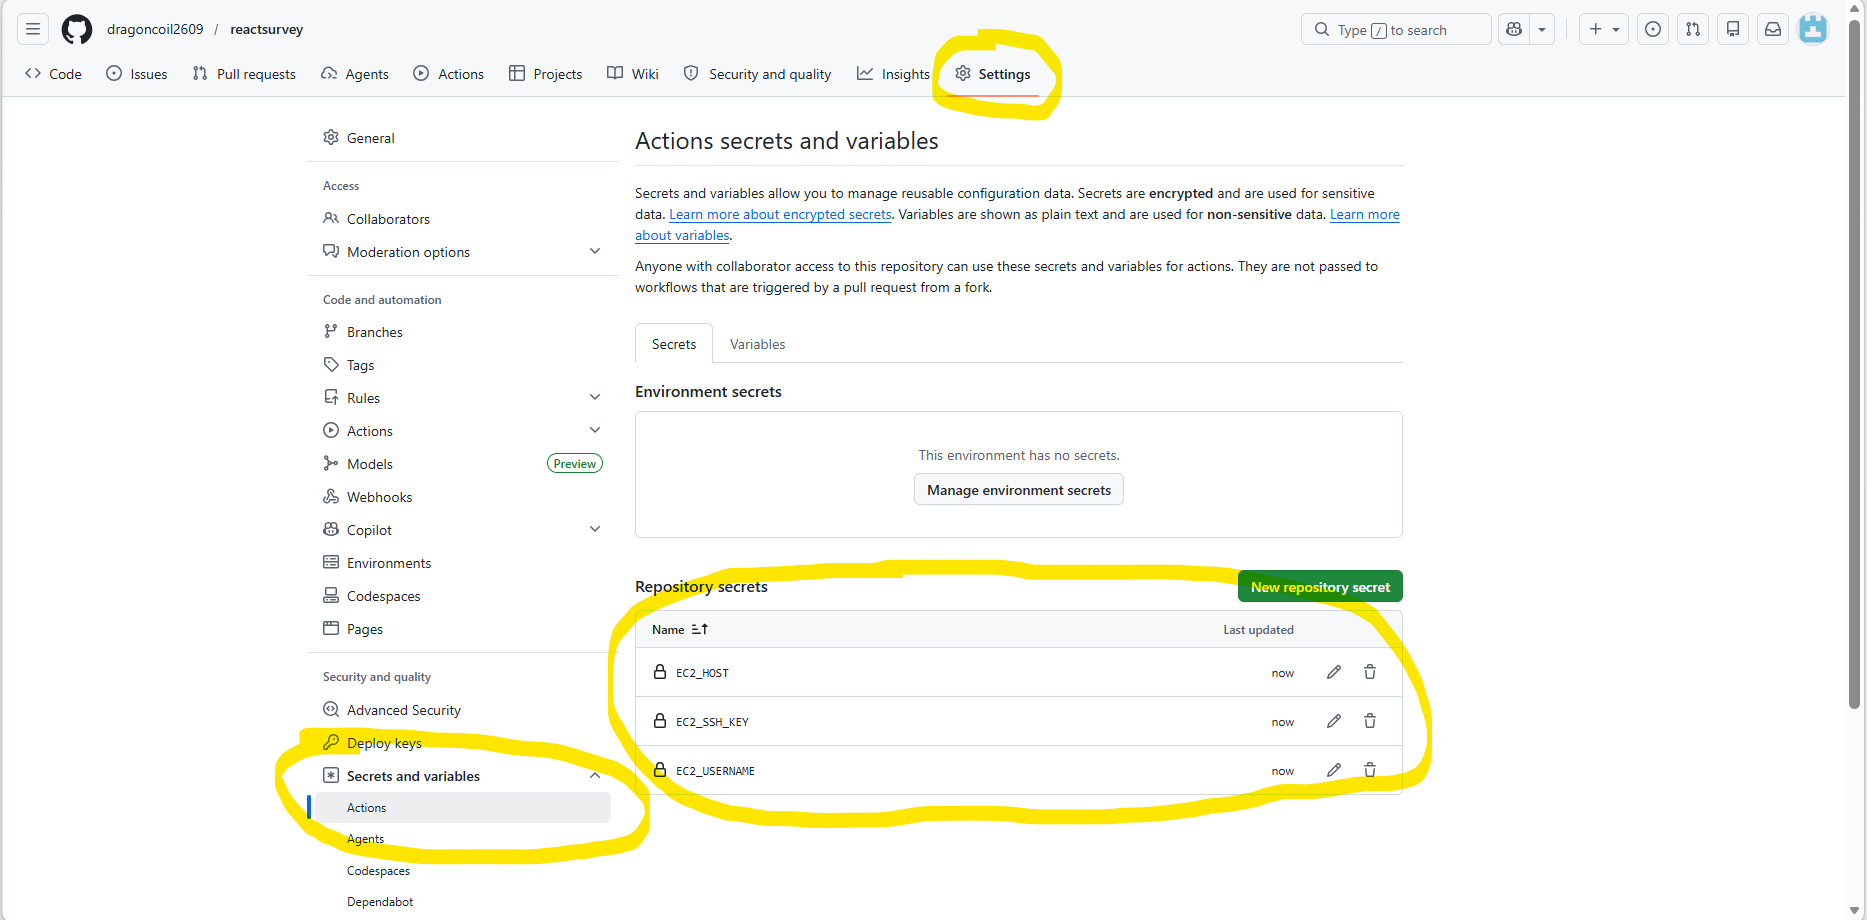
1. Set up GitHub Secrets Purpose: hand GitHub Actions the credentials it needs to SSH into EC2.
In the GitHub repository UI, go to Settings > Secrets and variables > Actions and add these three secrets:
1. EC2_HOST: the EC2 instance's Public IP.
2. EC2_USERNAME: ubuntu
3. EC2_SSH_KEY: the contents of my-key.pem.
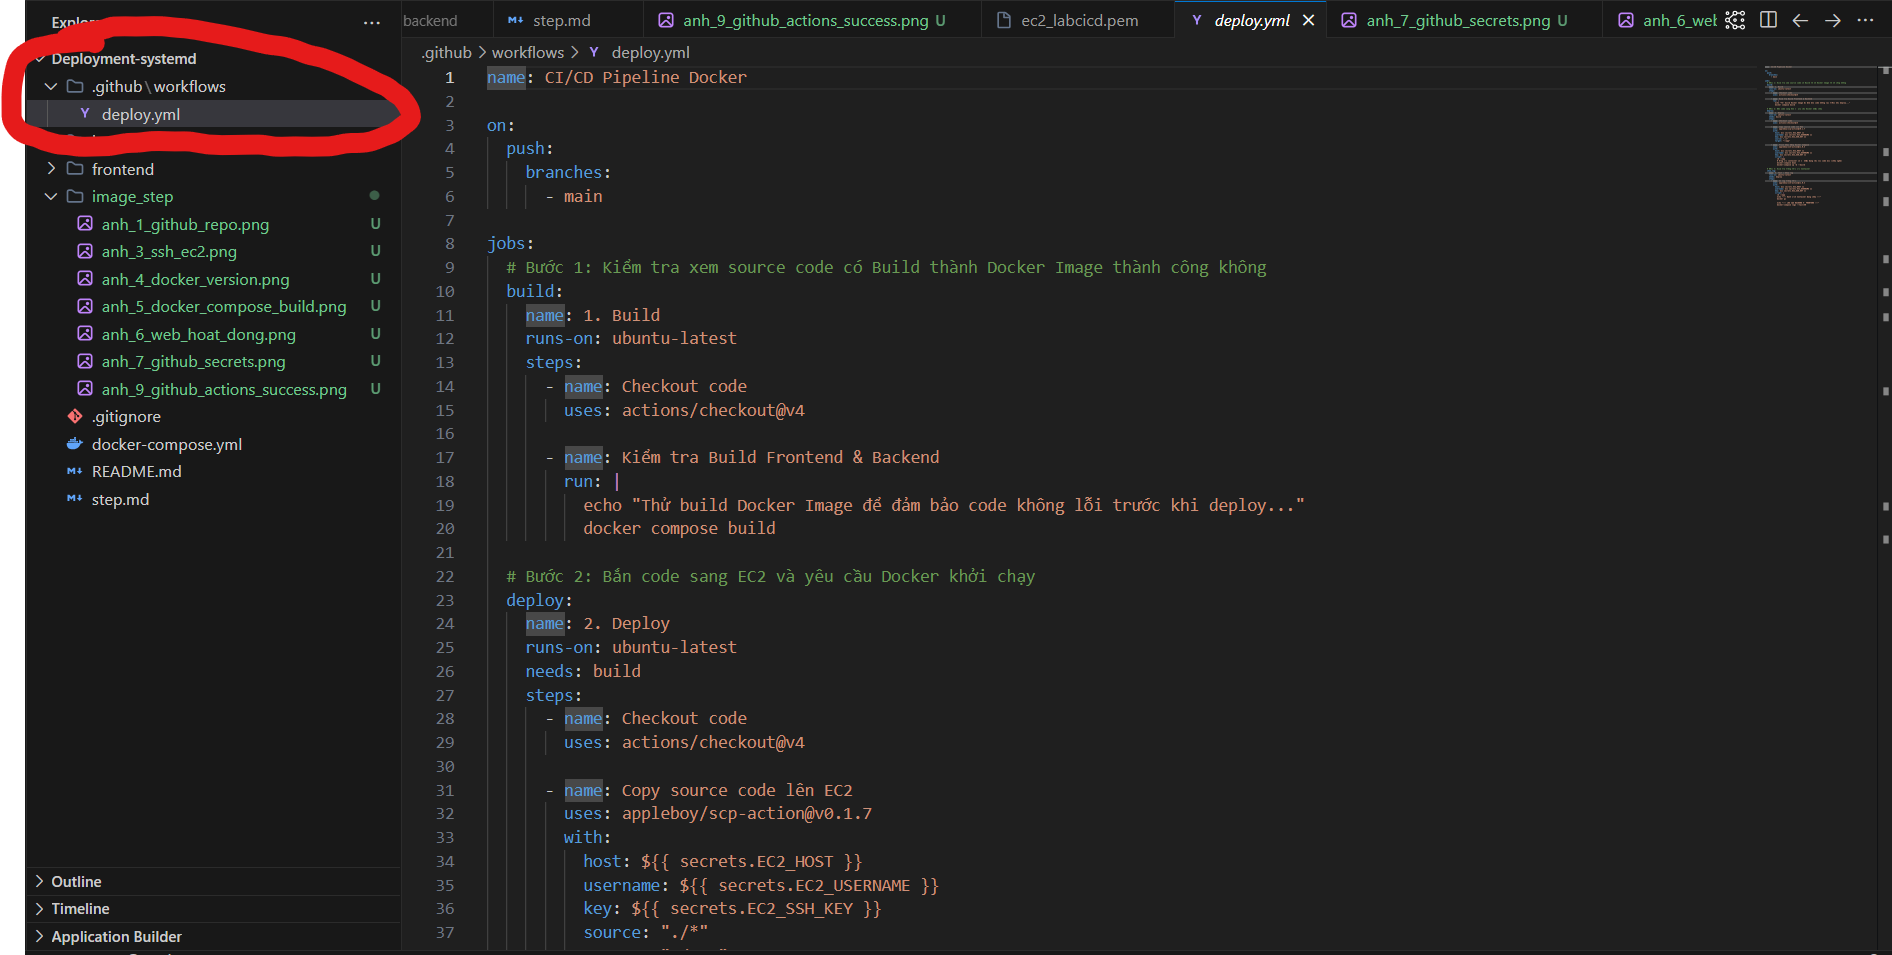
2. Create the workflow file
On your local machine, create .github/workflows/deploy.yml inside the project:
name: CI/CD Pipeline Docker

on:
  push:
    branches:
      - main # [CUSTOMIZE] Replace with the branch that should trigger CI/CD (e.g. master, dev)

jobs:
  # Step 1: confirm the source code can be built into a Docker image
  build:
    name: 1. Build
    runs-on: ubuntu-latest
    steps:
      - name: Checkout code
        uses: actions/checkout@v4

      - name: Verify the build
        run: |
          echo "Building the Docker image to make sure the code compiles before deploying..."
          # [CUSTOMIZE] Adjust the build command for your project
          docker compose build

  # Step 2: ship the source to the server and ask Docker to start it
  deploy:
    name: 2. Deploy
    runs-on: ubuntu-latest
    needs: build
    steps:
      - name: Checkout code
        uses: actions/checkout@v4

      - name: Copy source code to the server
        uses: appleboy/scp-action@v0.1.7
        with:
          host: ${{ secrets.EC2_HOST }}         # Server IP from GitHub Secrets
          username: ${{ secrets.EC2_USERNAME }} # User (e.g. ubuntu, root)
          key: ${{ secrets.EC2_SSH_KEY }}       # Private key (.pem)
          source: "./*"
          target: "~/app"                       # [CUSTOMIZE] Project folder on the server

      - name: Deploy via Docker Compose
        uses: appleboy/ssh-action@v1.0.3
        with:
          host: ${{ secrets.EC2_HOST }}
          username: ${{ secrets.EC2_USERNAME }}
          key: ${{ secrets.EC2_SSH_KEY }}
          script: |
            # [CUSTOMIZE] Change directory into the project folder
            cd ~/app

            # Stop the old containers and start fresh with the new code (in the background)
            docker compose down
            docker compose up -d --build

  # Step 3: print container status
  show_log:
    name: 3. Test / Show log
    runs-on: ubuntu-latest
    needs: deploy
    steps:
      - name: Print status
        uses: appleboy/ssh-action@v1.0.3
        with:
          host: ${{ secrets.EC2_HOST }}
          username: ${{ secrets.EC2_USERNAME }}
          key: ${{ secrets.EC2_SSH_KEY }}
          script: |
            cd ~/app # [CUSTOMIZE] Project folder
            echo "--- Running containers ---"
            docker ps

            echo "--- LOGS ---"
            docker compose logs --tail=50

            echo "--- SMOKE TEST ---"
            sleep 5
            curl -f http://localhost:80 && echo "OK: the site is alive!" || (echo "FAIL: no response from the site!" && exit 1)
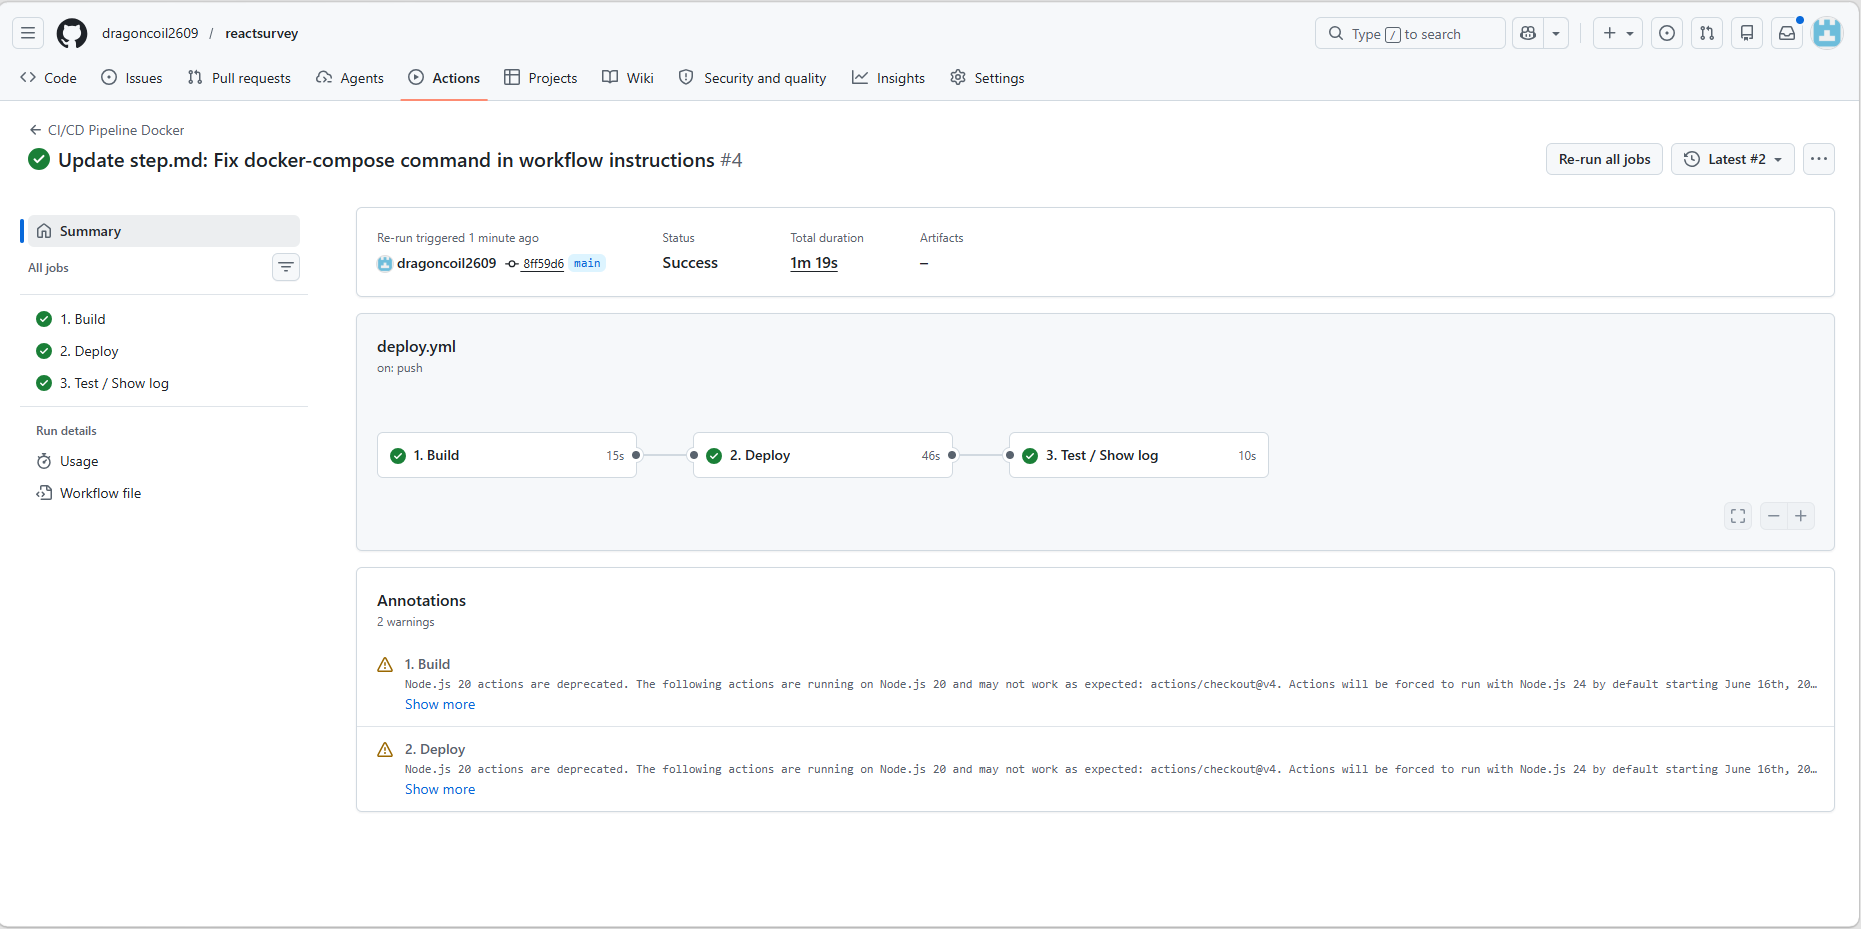
3. Automated deploy in action
Commit deploy.yml and push to main.
Open the Actions tab in the repository to watch it run. The three steps (Build, Deploy, Show log) execute in order.
Verify the CI/CD pipeline end-to-end
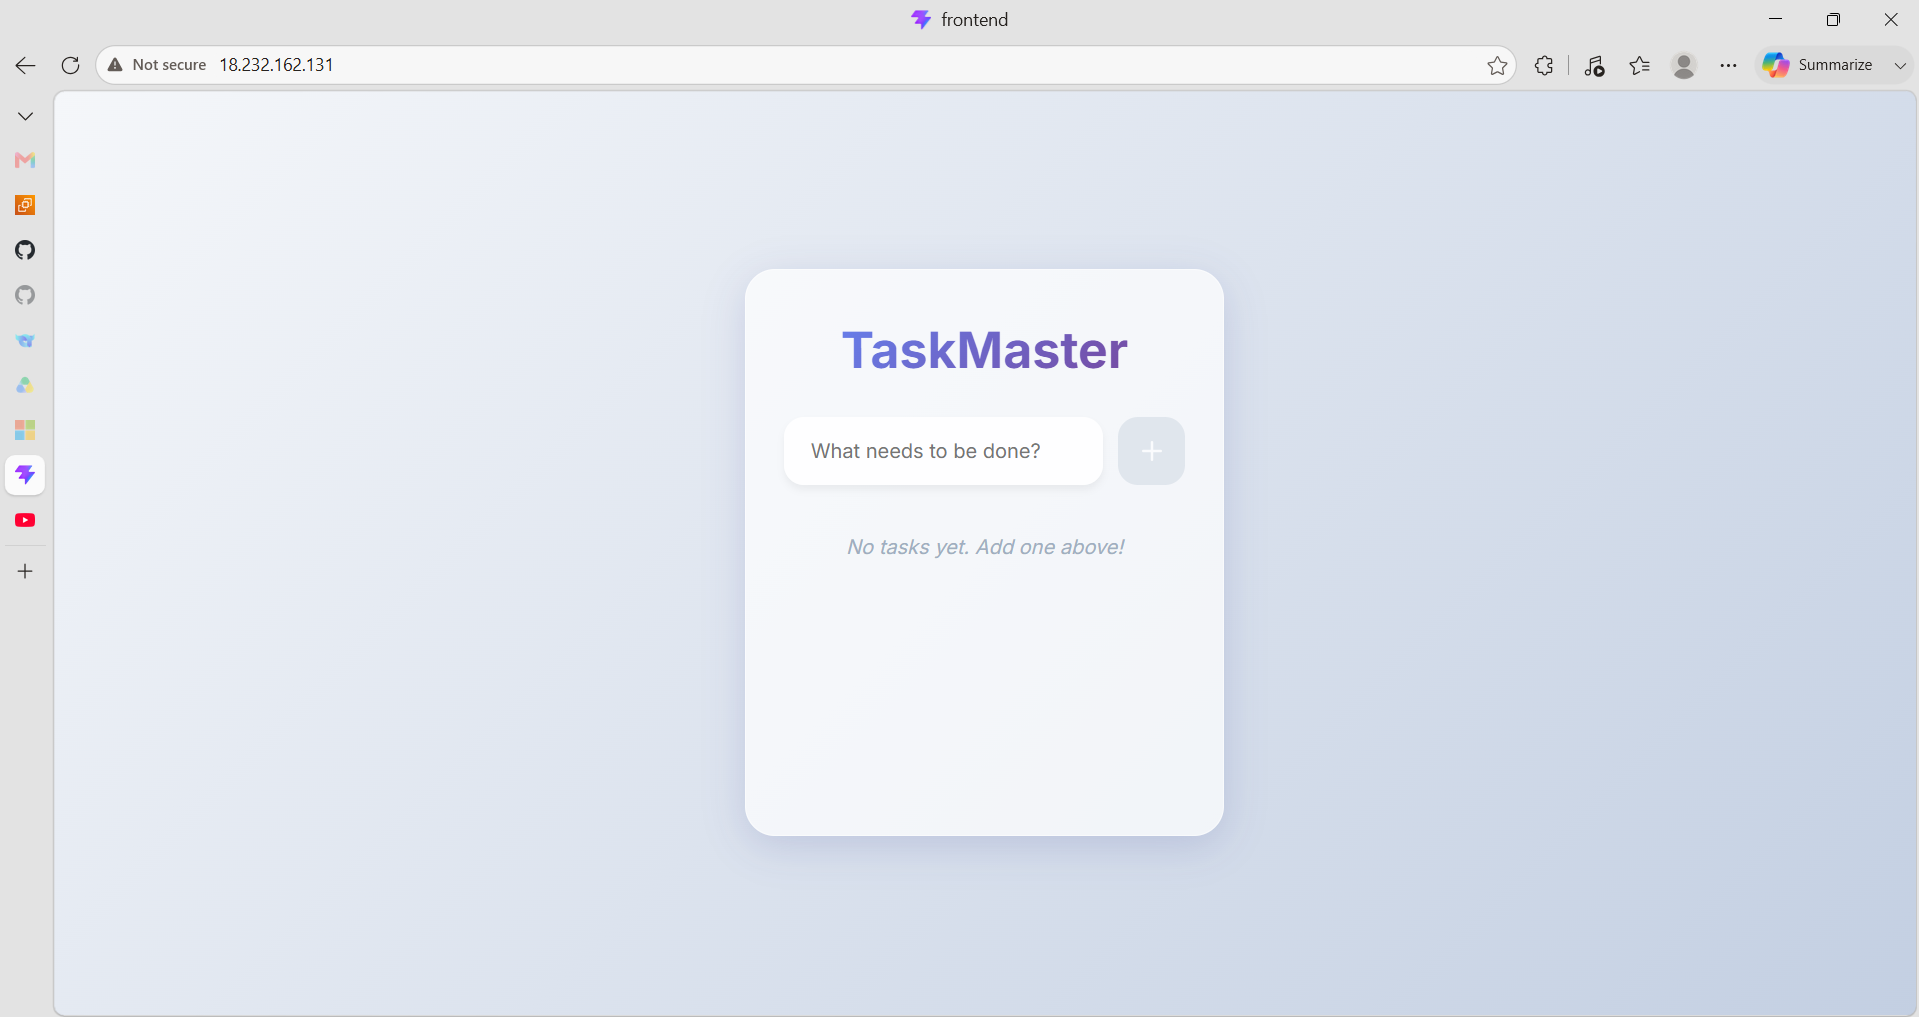
Now sanity-check the automation by making a tiny UI change and watching it land on the server.
1. Edit the frontend source
Open frontend/src/App.jsx locally and tweak a piece of text:
// Find the <h1> line and change it to:
<h1>To-Do List (CI/CD enabled!)</h1>

// Or add a notice below it:
<p style={{ color: 'green', textAlign: 'center', fontWeight: 'bold' }}>
  The latest version went live automatically!
</p>

2. Push to GitHub Run the usual git commands on your local terminal:
git add frontend/src/App.jsx
git commit -m "UI: add a notice to verify CI/CD"
git push
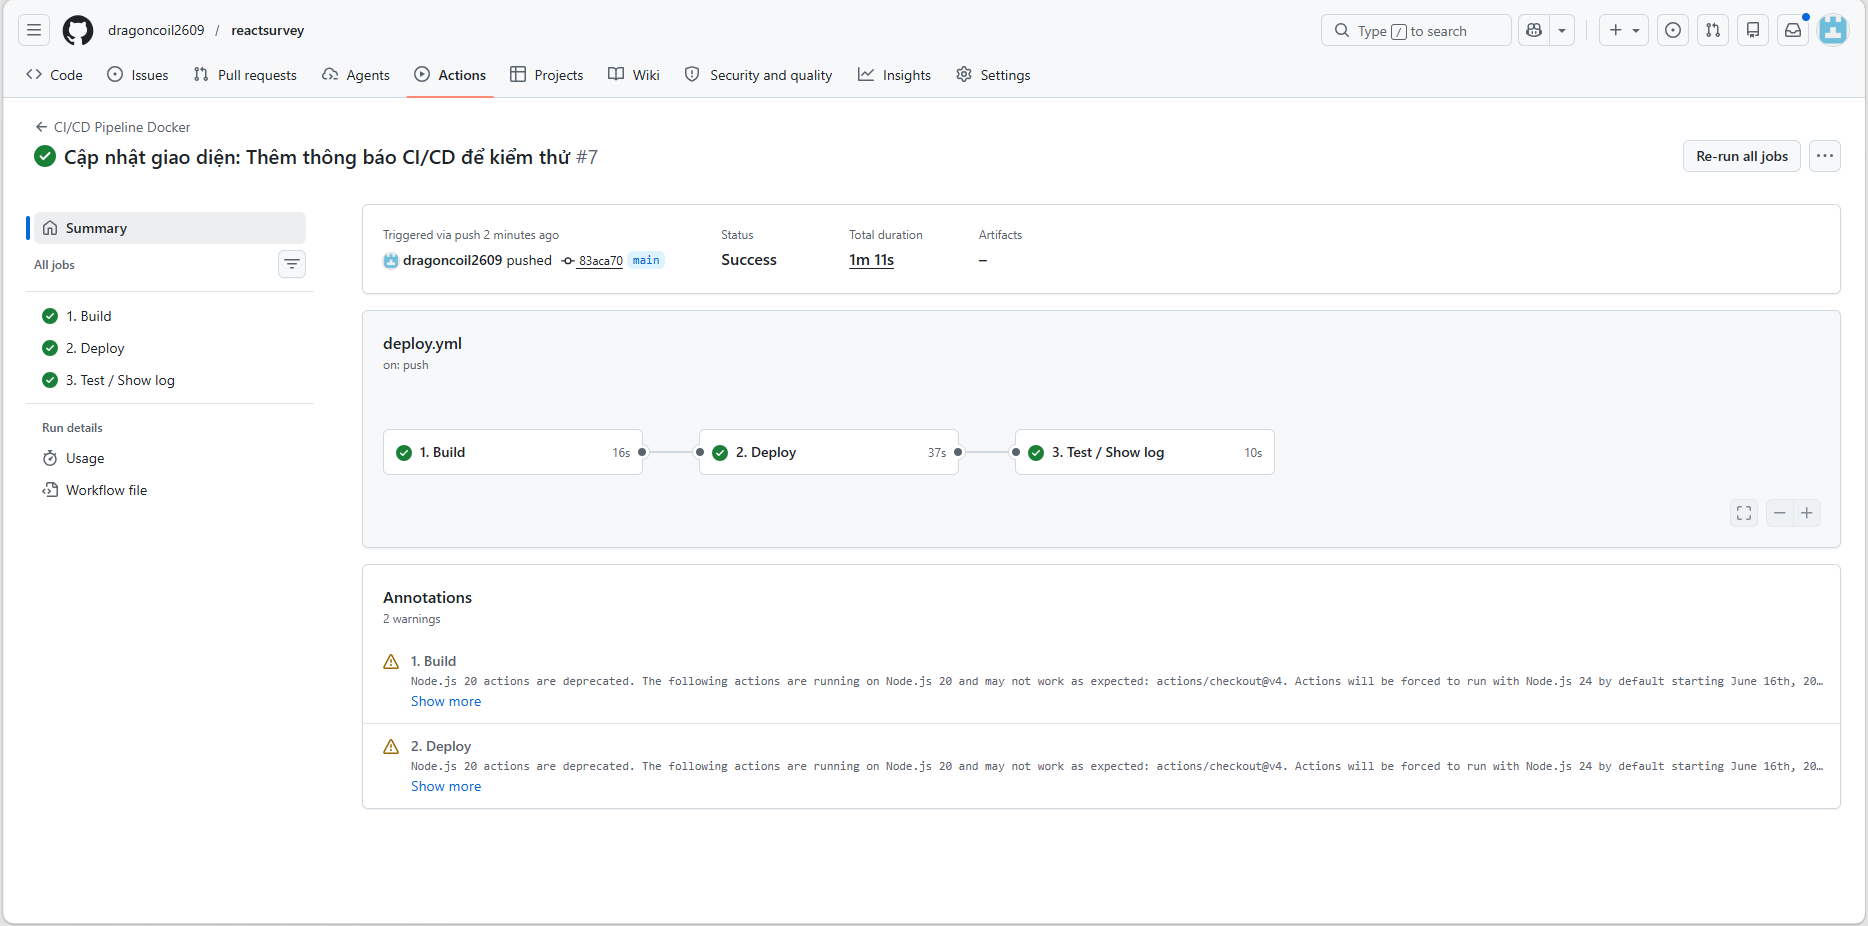
3. Check the result Open the Actions tab and you'll see a new run start automatically. Wait for the green check, then reload the EC2 Public IP — the new line shows up right away.

Mapping the actual pipeline back to the 4 standard stages
Comparing the deploy.yml from the case study to the textbook framework:
- Source/Checkout: the uses: actions/checkout@v4 step.
- Build: the step that runs docker compose build.
- Test: not wired up (this basic pipeline does not include a unit-test step).
- Deploy: the Deploy job — SCP the code over, then SSH and run docker compose up.
Limitations of this basic pipeline
Even after automating the flow, this pipeline still has 5 limitations. Part 2 tackles 3 that you can apply right away (deploy speed, server overload, key hardening). The remaining 2 (Downtime, automated Rollback) need a more involved architecture like Kubernetes or Blue-Green:
- Service downtime: every deploy runs docker compose down, which stops the service entirely until the new image finishes building. User experience interrupted.
- No automated rollback: the new build is written straight over the old one. If the new version is broken, rolling back is manual and awkward.
- Slow transfer: SCP'ing hundreds of small source files over SSH wastes a lot of time.
- Server overload risk: asking a small EC2 instance (like t2.micro) to run the build itself can blow through its RAM (Out of Memory) and freeze the box.
- No concurrency control: if two developers push to main at the same time, both pipelines run in parallel and may corrupt each other's state.
(Continue to Part 2 to upgrade the pipeline and address these issues!)
This is the first part